
Expert Guidance for Quality Spray Foam Repairs
Expert guidance for a quality spray foam repair centers on a meticulous, multi-step process that restores the insulation’s integrity. It begins with the complete removal of all damaged or compromised foam, followed by a thorough preparation of the exposed surfaces to ensure a strong bond. The repair must be performed with the correct type of foam, applied with precisely calibrated equipment, and result in a seamless, fully cured patch that integrates perfectly with the existing insulation. A successful repair is not just a fill; it’s a technical restoration of the building’s thermal and air barrier.
Spray foam insulation is known for its incredible durability, but situations like plumbing leaks, renovations, or pest damage can make repairs necessary. Unlike a new installation, a repair is a more delicate procedure that requires a specific skill set. This guide, based on the best practices of seasoned spray foam professionals, outlines the essential elements of a high-quality, lasting repair.
The Critical First Step: Damage Assessment and Removal
Before any repair can begin, a thorough assessment is required to understand the full extent of the damage. An expert will first determine the cause. Was it a one-time event like a burst pipe, or is it an ongoing issue like a slow roof leak? Identifying the root cause is essential to ensure the problem doesn’t recur after the repair is complete.
Once the scope is understood, the next step is the surgical removal of all compromised foam. A quality contractor will not spray new foam over old, damaged material. They will use specialized saws or blades to make clean, precise cuts, removing any foam that is wet, discolored, crumbly, or has pulled away from the studs or sheathing. The goal is to cut back to a solid, clean, and well-adhered foam surface that can serve as a stable foundation for the new material.
- Bonus Tip: An expert will often cut the damaged area into a square or rectangular shape with straight edges. This creates a more uniform and manageable area to work with and results in a cleaner, stronger bond between the old and new foam.
Preparation Is Everything: Creating the Ideal Bonding Surface
With the damaged foam removed, the focus shifts to preparing the area for the new application. This is arguably the most important step in the entire process. The exposed substrate, whether it’s wood, metal, or concrete, must be completely clean and dry. Any dust, debris, or moisture will compromise the bond of the new foam.
Equally important is the preparation of the cut edges of the existing foam. These surfaces must also be clean and dry. A meticulous contractor will ensure there are no loose particles on these edges. They will also verify that the correct type of foam is used for the repair. Open-cell foam should be patched with open-cell, and closed-cell with closed-cell. This is critical for maintaining the wall assembly’s intended performance regarding vapor permeability and density. Mixing types can lead to unintended moisture issues down the road.

The Technical Art of Application
Repairing a section of spray foam is a more precise task than a large, open-wall installation. The contractor’s skill and the quality of their equipment are put to the test.
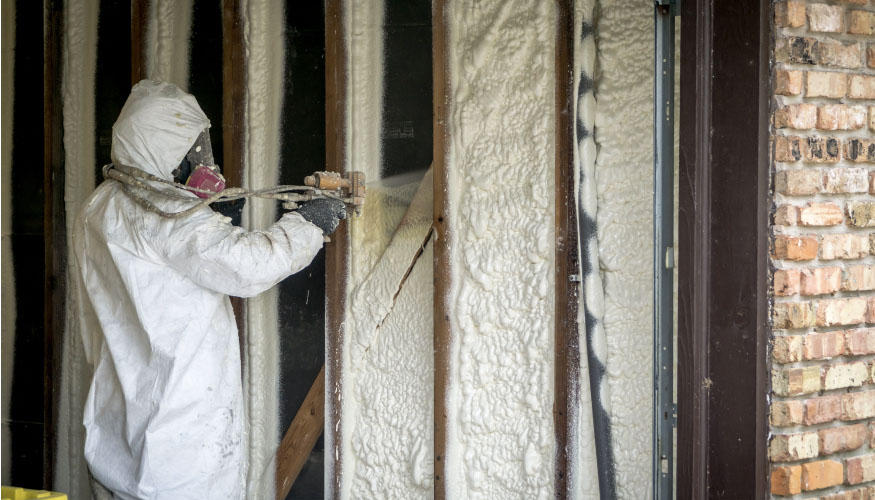
Professional spray foam rigs allow for the precise calibration of the two chemical components’ temperature and pressure. For a small patch, this precision is essential. An off-ratio mix, even by a small margin, can result in foam that fails to cure properly, leading to a soft, sticky patch that has to be removed. The contractor will apply the new foam in thin, controlled layers, or “lifts.” This technique is crucial for allowing the foam to cure correctly from the inside out and for preventing it from overheating during the exothermic chemical reaction. The goal is to slightly overfill the cavity, allowing the foam to expand just beyond the stud line.
Hallmarks of a Professional Repair Job
The difference between a high-quality repair and a poor one is often obvious upon close inspection. Here are the key things to look for.
|
Characteristic |
A Quality, Professional Repair |
A Poor or Amateur Repair |
|---|---|---|
|
The Seam |
Seamless integration; the new foam bonds tightly to the old. |
A visible gap or crack is present between the new and old foam. |
|
Texture & Density |
Consistent with the surrounding foam; uniform cell structure. |
Has large voids, is crumbly, or feels overly dense and brittle. |
|
Final Surface |
Fully cured (firm and dry); trimmed perfectly flush with the studs. |
Feels tacky, soft, or wet; is uneven, bulging, or recessed. |
|
Odor |
No lingering chemical smell after proper ventilation. |
A persistent, fishy, or chemical odor that does not go away. |
Post-Application: Curing, Trimming, and Final Inspection
After the foam has been applied, it needs time to fully cure and harden. A professional will ensure the area is properly ventilated during this period. Once the foam is fully cured, it is ready to be trimmed. This is done with a long, sharp blade or a specialized trimming tool. The goal is to cut the excess foam off in a smooth motion, leaving a surface that is perfectly flush with the face of the wall studs. This step is essential for the drywall to be installed smoothly over the repaired area.
The final step is a thorough inspection. A quality repair should be visually and tactilely indistinguishable from the surrounding insulation, aside from a potential slight color difference. Run your hand over the seam between the old and new foam. It should feel smooth and solid, with no discernible gap. The patch itself should be firm and inert. Any deviation from this is a sign that the repair was not performed to professional standards.
- Bonus Tip: A good contractor will not rush the cleanup. They should remove all trimmed foam debris and leave the worksite as clean as they found it. Their respect for your property is often a good indicator of their respect for their craft.
Things to Consider Before Hiring a Repair Specialist
Not every insulation company specializes in or excels at repair work. Before hiring, it’s important to ask the right questions.
First, specifically inquire about their experience with repairs. Ask them to describe their process for preparation and bonding. Second, confirm they will use the same type of foam that is currently in your walls or attic. A contractor who is vague on this point should be avoided. Finally, get a detailed, written quote that outlines every step of the process, from the removal of the old foam to the final cleanup. A simple price without a scope of work is not sufficient.
Common Questions About the Spray foam Repair Process
Why would I ever need to repair spray foam?
The most common reasons are planned renovations (e.g., moving plumbing or electrical lines), accidental damage (e.g., a hole cut in the wrong place), water damage from a leak, or the removal of a pest infestation.
How do you ensure the new foam sticks to the old foam?
The key is meticulous preparation. The cut edge of the existing foam must be clean, dry, and free of any loose particles. When the new foam is sprayed, it forms a strong chemical and mechanical bond with this properly prepared surface.
Is a persistent chemical smell normal after a repair?
No. While there will be an odor during the application and curing process, it should dissipate completely after the area is ventilated for the recommended time (usually 24 hours). A lingering smell is a major red flag that the foam was mixed improperly and did not cure.
Can I use a can of DIY foam from a hardware store to patch a small hole?
This is strongly discouraged for your building’s thermal envelope. The foam in those cans has a different chemical makeup, a much lower R-value, and does not create a proper air seal. It is not a substitute for professional-grade, two-component spray foam.
What happens if a repair isn’t done right?
A failed repair will create a weak spot in your home’s insulation. This can lead to the very problems you were trying to solve: energy loss, uncomfortable drafts, and, if the seal is poor, potential condensation and moisture issues within the wall.
A Proper Repair Restores Your Home’s Performance
Expert guidance for quality spray foam repairs emphasizes that this work is a technical craft, not just a simple patch job. It requires a deep understanding of the materials, precise equipment, and a methodical approach to preparation and application. When done correctly, a repair fully restores the performance of your home’s insulation and air barrier, protecting your initial investment and ensuring continued comfort and energy efficiency for years to come.
Get an Expert Assessment for Your Insulation Repair
If you have damaged spray foam insulation or are unsure about the quality of a recent repair, getting a professional evaluation is the best course of action. An experienced technician can accurately assess the situation and provide a clear, detailed plan for a proper restoration. For homeowners seeking an expert opinion, a company like Supreme Spray Foam LV can provide a thorough consultation. Their team is ready to help and can be reached at (702) 904-9895 or by email at [email protected].
Reviewer: Michael Carter reviewed this article using insight gained over 12 years in the spray foam business. His feedback focused on helping contractors reach new customers without overcomplicating their message.








Post Comment