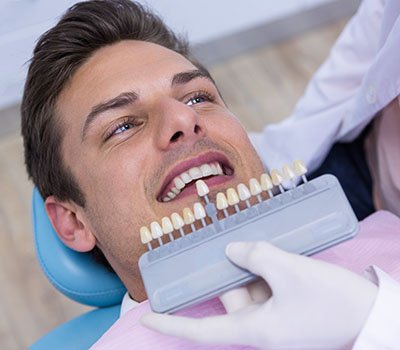
Advanced Techniques for Highly Accurate Bite Registration
Introduction:
In restorative and prosthetic dentistry, the bite registration—the recorded relationship between the maxillary and mandibular arches—is arguably the single most critical step that determines the success or failure of any restoration. A discrepancy of just a few microns in the final occlusion can necessitate extensive chair time for adjustments, potential costly remakes, or, worse, lead to patient discomfort and TMD issues. Therefore, mastering the techniques that ensure a truly accurate, repeatable registration is not merely a clinical skill; it is a prerequisite for predictable, high-quality dentistry.
The goal is always to record the correct maxillomandibular relationship, whether it is Centric Relation (CR) or Maximum Intercuspation (MIP), with absolute fidelity. The choice of material plays a paramount role in achieving this fidelity. While a variety of materials exist, the gold standard typically involves polyvinyl siloxane (PVS) or vinyl polysiloxane (VPS) materials due to their dimensional stability and minimal resistance upon closure. For example, a fast-setting, low-resistance material, sometimes affectionately known by its color as blu mousse, provides superior stability when capturing the finest occlusal details without deflecting the patient’s mandible, which is a common source of error in less viscous materials. This beginner’s guide moves beyond the basics, detailing seven advanced techniques and habits you must adopt to achieve highly accurate bite registrations, ensuring a perfect fit every time.
Centric Relation vs. Maximum Intercuspation
Before you even touch a syringe, you must definitively decide which jaw relationship you intend to capture, as the technique varies drastically. The vast majority of single-unit restorations utilize Maximum Intercuspation (MIP), which is the complete interdigitation of the teeth, where the greatest number of opposing cusps and fossae mesh together. However, complex restorative cases, full-mouth reconstructions, or situations involving significant wear require Centric Relation (CR), which is the most retruded position of the condyles in the glenoid fossa, regardless of tooth contact.
Understand the Difference: MIP is tooth-guided; CR is joint-guided. A common error is attempting to record CR without fully deprogramming the muscles. If you fail to successfully remove the patient’s proprioceptive muscle memory (their habitual bite), the resulting record will be neither true CR nor true MIP, leading to a “wasted” record that guarantees occlusal interference. Therefore, the goal of pre-registration conditioning is to guide the mandible to a repeatable, unstrained position, allowing the material to capture the necessary details without deflection. We use specific tools and techniques to achieve this repeatable, unstrained jaw posture before introducing any bite registration material.
Choosing the Right Tools and Trays
The success of any registration depends heavily on the properties of the material and the means by which you deliver it. Do not simply rely on the fastest-setting product; instead, consider the viscosity and the closure resistance.
Habit 1: Choosing Low-Viscosity VPS/PVS Material. Always select a rigid, fast-setting VPS material that exhibits low viscosity and minimal resistance to closure. High-viscosity materials create a hydraulic effect, resisting the patient’s closure and potentially pushing the mandible out of its intended position. For complex cases involving multiple edentulous spaces or full arches, a highly rigid, accurate VPS material is non-negotiable for capturing precise dimensions.
Tray Selection: Furthermore, use a rigid, non-perforated quadrant or full-arch tray, ensuring stability. Avoid flimsy, disposable plastic trays that can flex during the set or withdrawal, as this immediately introduces distortion into your final record. Therefore, ensure your tray provides firm, unyielding support to the material throughout the entire setting process. Prior to application, always clean and dry the occlusal surfaces and apply a thin layer of tray adhesive, especially when using metal trays, to prevent the material from peeling away—a frequent source of registration error.
The Lucia Jig and Leaf Gauge Technique
When aiming for Centric Relation, you cannot rely on the patient’s natural closing muscles, which are trained to close into their maximum intercuspation. You must actively deprogram these muscles using an anterior jig or appliance.
Habit 2: The Sequential Deprogramming Method. Begin by placing a Leaf Gauge or a Lucia Jig on the patient’s mandibular incisors, separating the posterior teeth. The leaf gauge consists of calibrated plastic strips; the Lucia jig is a custom-made acrylic device. The purpose of these tools is to prevent posterior tooth contact, forcing the patient to rely on their temporomandibular joint (TMJ) guidance rather than their tooth-guided habitual closure.
Instruct the patient to gently tap their teeth together on the jig until only a single leaf (or the jig itself) is required to maintain the posterior clearance. Maintain this state for five to ten minutes. This extended period of anterior contact is crucial for deprogramming the proprioceptors. Once deprogrammed, you can gently guide the jaw into the CR position using a bilateral manipulation technique (often called the chin-point-thumb method or chin-point-bimanual method). While the patient holds this unstrained position, quickly inject your low-viscosity material into the quadrant. This disciplined use of an anterior stop is essential for achieving a true, reproducible Centric Relation record.
The Three-Point Contact Method
Recording an entire arch relationship in one large piece of material dramatically increases the chance of patient closure error, material drag, and subsequent remounting failure. For complex, multiple-unit cases, adopt a segmented approach that isolates the contact points.
Habit 3: The Segmented Three-Point Record. Instead of a full-arch wafer, aim for at least three strategically located, small, non-interfering sections of registration material.
-
Placement: Identify three areas: one on the most posterior tooth on the patient’s non-working side, one on the most posterior tooth on the working side, and one in the anterior region (e.g., between the premolars).
-
Execution: Inject the material only onto the occlusal surfaces of these three regions. Crucially, ensure the material does not contact the soft tissue, as soft tissue distortion is a primary cause of inaccurate registration.
-
The Result: Instruct the patient to close lightly into their predetermined position (MIP or CR). Once set, you will have three separate, rigid segments that act as verifiable reference points. When mounting the casts, the laboratory technician uses these three isolated contacts to precisely interdigitate the stone models. This segmented method minimizes the bulk of material that could deflect the jaw and provides distinct, verifiable points of contact, maximizing accuracy during the articulation process.
Compound Rims and Gothic Arch Tracers
When working with edentulous arches or severely worn arches, the existing occlusal scheme offers no guidance. The challenge shifts from deprogramming to establishing a functional vertical dimension and horizontal position.
Habit 4: Stabilized Baseplates and Wax Rims. For full-arch edentulous cases, you must first fabricate rigid, custom acrylic baseplates. These plates carry a custom-contoured wax or compound occlusion rim. The rim allows you to establish the correct Vertical Dimension of Occlusion (VDO). Once VDO is confirmed and marked, you can refine the horizontal relationship.
-
Gothic Arch Tracer: For maximum precision in the horizontal position (CR), affix a Gothic Arch Tracer to the baseplates. This device records the precise, most retruded position of the mandible relative to the maxilla by having the patient execute lateral movements. The resulting apex recorded on the tracing plate precisely marks the CR position, which you then capture with a tiny spot of fast-setting VPS material. This two-stage approach—VDO establishment followed by horizontal CR capture—is indispensable for predictable prosthetic success.
The Final Clinical and Technical Steps
Even the best technique can fail if the record is not verified clinically and transferred correctly to the articulator. Never assume the record is accurate; you must prove it.
Habit 5: Clinical Verification and Transfer. Once the bite registration material is fully set, remove the record and thoroughly inspect it. Look for:
-
Puncture Marks: Holes through the material indicate an attempt to close past the desired position, resulting in an inaccurate record. Discard and retry.
-
Tissue Impingement: Material covering or displacing the gingiva or soft tissue suggests potential distortion. Trim any excess before verification.
Verification in the Mouth: Place the record back into the patient’s mouth and gently guide them to close into it. The record should seat passively and firmly onto the teeth without rock or movement. If the patient feels a strain, or if the material prevents the teeth from seating completely, the record is faulty.
Articulator Mounting: Finally, ensure that the laboratory mounts the casts accurately. They must use your verified bite record to securely interdigitate the stone casts before fixing them to the articulator. Crucially, never moisten the stone models when mounting. Soaking the stone can cause expansion, introducing the very distortion you worked so hard to avoid. Use dry casts and immediate set plaster to lock the casts to the articulator using the precise information provided by your carefully captured bite record.
Managing Soft Tissue, Pressure, and Patient Effort
Even when following these advanced protocols, subtle clinical errors can undermine the most careful technique. Developing an awareness of these pitfalls will refine your registration process.
Habit 6: Pressure and Effort Management. Instruct your patient to close with minimal force. Excessive closing force can cause the VPS material to flow and distort laterally, potentially introducing a small but significant occlusal shift. Use light, passive guidance and clear verbal instructions. Tell the patient to “just touch,” rather than “bite down hard.”
Managing Soft Tissue: Always ensure the material is confined to the hard tissue (teeth). Any material that flows over the tongue, buccal shelf, or floor of the mouth will distort and pull as the patient attempts to maintain position or when the material is removed. Use cotton rolls or gauze to manage saliva and retract the cheek and tongue while injecting the material. If necessary, trim excess soft tissue before taking the impression.
Material Cleanliness: Lastly, always ensure the occlusal surfaces are thoroughly dry and free of debris, blood, or heavy saliva. Any surface contamination acts as a separator, preventing the registration material from capturing the microscopic detail necessary for a truly accurate die-model relationship. By meticulously controlling these minute details, you enhance the fidelity of your record, thereby dramatically reducing the potential for occlusal errors in the final restoration. This level of clinical discipline elevates your work from merely adequate to consistently excellent.
Conclusion:
Perfecting the fit of any restoration begins and ends with an accurate bite registration. By moving beyond rudimentary techniques and adopting these advanced, disciplined methods—from the use of deprogramming jigs and low-viscosity materials to the segmented three-point contact method and rigorous clinical verification—you seize control over the variables that often plague restorative dentistry. Recognizing the distinct requirements of CR versus MIP, managing patient effort, and ensuring impeccable material handling collectively elevate your clinical skill set. Embrace this meticulous approach; it is the definitive path to minimizing remakes, maximizing chairside efficiency, and delivering the predictable, high-quality results your patients expect and deserve.






Post Comment