Getting your walls ready for paint or wallpaper can feel like a big task. But don’t worry! With some simple steps and the right tools, you can master the art of wall surface preparation and finishing. This guide will help you learn how to create beautiful, smooth walls in your home. Whether you’re an expert or a beginner, you can follow these easy tips to get great results.
Why Wall Preparation Matters
Preparing your walls is key. It helps the final look of your space. If you skip this step, you might end up with uneven surfaces or peeling paint. Think of it like baking a cake. If you don’t mix the batter well, the cake won’t rise properly. Similarly, if your walls aren’t ready, the finish won’t look good.
When you think of home improvement, you might picture drywall installation. This process is a big part of wall preparation. Drywall creates a flat surface for paint or wallpaper. It’s a popular choice for many homeowners. But remember, the surface must be ready before you start.
Tools You Will Need
Before we dive in, let’s check what tools you need. Having the right tools makes the job easier. Here’s a simple list:
- Drywall knife: This helps spread mud smoothly.
- Sanding block or sponge: Use this to smooth out rough spots.
- Trowel: A trowel is handy for applying joint compound.
- Primer: This prepares the surface for paint.
- Paint or wallpaper supplies: Get what you need for the finish.
Keep these tools close. You may also want to wear a mask and goggles. Dust can fly around, and it’s best to stay safe.
Assessing Your Walls
Check for Damage
Start by looking closely at your walls. Check for cracks, holes, and bumps. These are common issues. If your walls are in bad shape, take notes. Fixing these problems is crucial for a smooth finish.
Clean the Surface
Next, clean the walls. Dust and dirt can mess up how the paint or wallpaper sticks. Use a damp cloth or sponge to wipe the walls. Make sure to let them dry completely before moving to the next step.
Remove Old Materials
If your walls have old paint or wallpaper, it’s time to take them off. Use a scrapper for paint or a wallpaper steamer for old paper. This step can be a bit messy, but it’s necessary. Leaving old materials can cause issues with the new finish.
Filling Holes and Cracks
Gather Your Materials
To fix holes and cracks, you’ll need a few extra supplies. Get some joint compound and a drywall patch if needed. Don’t worry; it’s easy to use!
Fill the Holes
For small holes, use a putty knife to spread the joint compound over them. Make sure to fill the hole completely. For bigger holes, you’ll need to use a drywall patch. Apply the patch and then cover it with joint compound. Once everything looks smooth, let it dry.
Sanding Your Walls
Why Sanding is Important
After filling any gaps, it’s time to sand your walls smooth. This is a crucial step! Sanding ensures that your finish looks nice and neat. It removes rough spots and dried mud.
How to Sand
Use a sanding block or sponge. Start with coarse sandpaper to remove large bumps. Then switch to fine sandpaper for a smooth finish. Be gentle; you don’t want to create new holes.
Try to sand in a circular motion. This lets you feel for any uneven areas. When you’re done, wipe the walls down to remove dust.
Priming Your Walls
What is Priming?
Now we reach an important point: priming! Priming prepares the surface for paint. It helps the paint stick better and gives you a nice base color.
How to Apply Primer
Choose a high-quality primer. Use a roller for large areas and a brush for the edges. Apply the primer evenly and let it dry completely. This might take a few hours. Follow the instructions on the can for the best results.
Painting or Applying Wallpaper
After priming, it’s time for the fun part: finishing your walls!
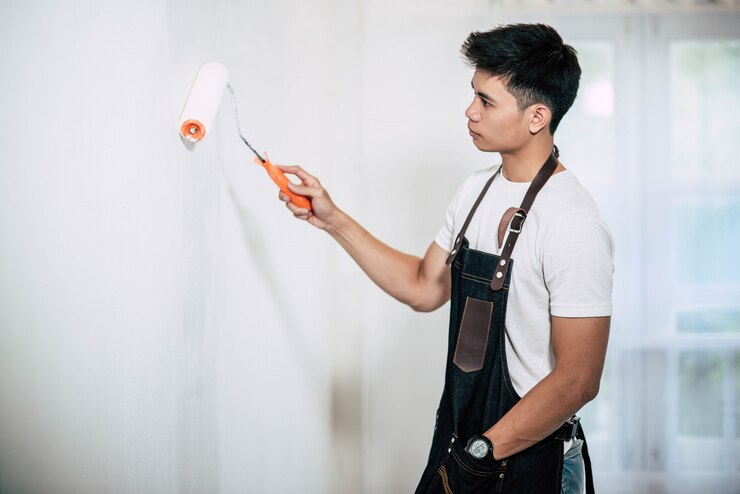
Painting Your Walls
- Choose Your Paint: Select a color you love. Be bold!
- Apply the First Coat: Use a roller to layer the paint. Again, use a brush for edges.
- Let it Dry: Wait for the first coat to dry before adding a second one. Usually, two coats do the trick.
Wallpapering Your Walls
If you choose wallpaper, here’s what to do:
- Select the Wallpaper: Pick a pattern that fits your style.
- Cut and Measure: Measure your walls and cut the wallpaper accordingly.
- Apply Adhesive: Follow the instructions for glue. Paste it evenly.
- Smooth Out Bubbles: Use a smoother to push out air bubbles.
Touching Up
Final Touches
Once your paint or wallpaper is dry,  check for any spots that need a touch-up. You want every inch of your wall to look perfect. Grab your brush and carefully fill in any missed areas.
Sealing the Deal
If you want extra protection, consider sealing your paint. This works well in kitchens and bathrooms where moisture is a concern.
Cleaning Up
After a successful wall finishing task, it’s important to clean up.
Pack Your Tools
Once you’re done, clean up your tools. Rinse any brushes, and store them properly to use next time.
Dispose of Waste Properly
Dispose of any drywall debris or old materials responsibly. Many places have recycling programs for this kind of waste. Check your local guidelines so you can do your part for the environment.
Achieving the Perfect Look
Every wall you finish is a new opportunity. With the right preparation and finishing techniques, you can create a fresh look for any room. Your efforts will enhance the beauty of your home.
Why Professional Help Can Be Useful
If you feel unsure at any step, asking for professional help is a great option. Experts can guide you or handle the job. But remember, with practice and patience, you can also master this art!
Conclusion
Mastering wall surface preparation and finishing takes time, but it’s worth it. You’ll take pride in your newly improved spaces. Plus, you’ll save money by doing it yourself! Enjoy the process and remember to celebrate your successes. With a little effort and the right techniques, your walls will look incredible.
So, roll up your sleeves and get to work. Your dream space is just a few steps away! Happy decorating!


Leave a Reply