Converting an image into an embroidery design is a fascinating process that combines creativity, technology, and artistry. Whether you’re looking to create personalized gifts, logos, or custom artwork on fabric, embroidery digitizing is the key to turning a simple image into a stunning embroidered piece. In this comprehensive guide, we will walk you through the entire process of converting an image into an embroidery design, ensuring that you achieve the best possible results.
What is Embroidery Digitizing?
Embroidery digitizing is the process of converting a design or image into a set of instructions that can be understood by an embroidery machine. This process involves translating the visual elements of the image into digital stitch patterns, which are then executed by the embroidery machine. It requires specialized software to create a design that can be stitched onto fabric while considering factors like stitch types, density, thread colors, and fabric type.
Why Do You Need to Convert an Image into an Embroidery Design?
Not all images are automatically ready for embroidery. Images such as photographs or intricate artwork need to be converted into embroidery files so that an embroidery machine can read and reproduce them on fabric. This conversion is essential for a few key reasons:
- Stitch Accuracy: The image needs to be translated into a series of stitches, which requires careful planning to ensure the design looks accurate and neat when embroidered.
- Fabric Compatibility: Some designs may need to be adjusted for specific fabrics, ensuring that the stitches hold and last.
- Color Management: Different thread colors need to be chosen and properly allocated to different parts of the design.
By digitizing your image, you ensure that the design will be suitable for embroidery and will produce the best final result.
Step 1: Choose the Right Image
Before starting the embroidery digitizing process, it’s important to choose an image that is appropriate for embroidery. Here are a few tips:
1.1 Image Simplicity
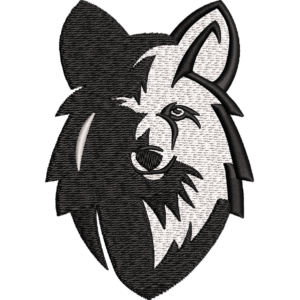
The more detailed and intricate the image, the more difficult it will be to convert into an embroidery design. Highly detailed photos with fine gradients or tiny text may not be ideal for embroidery, as they may lose clarity when scaled down to stitches. Stick to simpler designs, logos, or artwork with clean lines and solid areas of color. Simple graphics, clip art, or logos work best for embroidery.
1.2 Resolution
Choose an image with high resolution. High-resolution images have better clarity and are easier to manipulate during the embroidery digitizing process. Low-resolution images can appear pixelated and blurry once embroidered, which can affect the final outcome.
1.3 File Format
Use a common file format, such as JPG, PNG, or TIFF. These formats are easier to work with and compatible with most embroidery digitizing software. Vector images like SVG, EPS, or AI files can also work well, as they are scalable without losing quality.
Step 2: Import the Image into Digitizing Software
Once you’ve selected a suitable image, the next step is to import it into embroidery digitizing software. The software will be used to convert the image into a digital embroidery file. Some popular embroidery digitizing software includes:
- Adobe Illustrator (with embroidery plugins)
- CorelDRAW (with compatible embroidery plugins)
- Wilcom Embroidery Studio
- TruEmbroidery
- Embird
These software programs allow you to manipulate and convert your image into stitch instructions, adjusting various settings along the way.
Step 3: Trace and Simplify the Image
When the image is imported into the embroidery digitizing software, the next step is to trace it and simplify the design. This ensures that the embroidery machine can interpret the design easily. Follow these steps:
3.1 Automatic Tracing
Many digitizing programs feature automatic tracing tools that detect the outlines of your design. The software will convert the image into vector lines or paths, which are the basic structure that the embroidery machine can follow.
3.2 Manual Tracing
If your image is too complex for automatic tracing, you may need to manually trace the design using the software’s drawing tools. You can adjust the points and curves to get the desired shapes. This step is essential for ensuring that the design is clear and sharp when embroidered.
3.3 Simplification
In embroidery, simpler is often better. Complex gradients, small details, or fine text might not reproduce well with stitches. Therefore, it’s recommended to simplify the design by reducing intricate elements and focusing on bold, solid shapes that will stitch well. Embroidery digitizing often requires reducing the number of colors and simplifying shading to ensure the design is suitable for stitching.
Step 4: Adjust Stitch Settings
Once the image is traced and simplified, you’ll need to adjust the stitch settings. This is a crucial step in the embroidery digitizing process to ensure that the design stitches out properly. Here are some key settings to adjust:
4.1 Stitch Type
There are different types of stitches used in embroidery, and each one has a unique effect on the final design. Common stitch types include:
- Satin Stitch: Smooth and shiny stitches used for outlines and filled areas.
- Running Stitch: Simple, straight stitches often used for fine details.
- Fill Stitch: Used to fill large areas with stitches and create texture.
Select the appropriate stitch type for each part of the design based on its shape, size, and desired texture.
4.2 Stitch Density
Stitch density refers to how closely the stitches are placed together. For fine details, you may need a higher stitch density, while larger areas may require less dense stitching. Adjusting the density ensures that the design is neither too sparse nor too tightly packed, which can impact the appearance and quality of the embroidery.
4.3 Stitch Direction
The direction of the stitches is another factor that affects the texture and appearance of the design. For example, in fill areas, the stitch direction can be adjusted to create a smooth, flowing look. Ensure that the direction of the stitches complements the fabric and design.
4.4 Thread Color Assignment
Assign thread colors to the different parts of the design. You can either choose colors manually or let the software suggest suitable color palettes. Embroidery digitizing software allows you to match thread colors with fabric colors, ensuring that the design looks vibrant and visually appealing.
Step 5: Preview the Design
After adjusting the stitch settings and assigning thread colors, preview the design within the software. This preview simulates how the embroidery machine will execute the design on fabric. Look for any areas that may need adjustments, such as areas that are too dense or too sparse. Make sure that the design appears balanced and clear in the preview.
Step 6: Save and Export the Design
Once you’re satisfied with the design, it’s time to save and export the embroidery file. Most embroidery digitizing software allows you to save files in various formats, such as:
- DST: A common format for commercial embroidery machines.
- PES: A format used by Brother machines.
- EXP: A format compatible with Bernina machines.
Make sure to select the correct file format for your embroidery machine, and save a backup copy of the design in case you need to make future edits.
Step 7: Transfer the Design to the Embroidery Machine
The final step is to transfer the embroidery design file to your embroidery machine. Depending on the machine, this can be done via a USB drive, direct connection, or wireless transfer. Once the design is uploaded, you can start stitching the design onto your fabric. Be sure to test the design on a sample fabric to ensure everything stitches as expected.
Conclusion
Converting an image into an embroidery design through embroidery digitizing is an exciting process that allows you to transform digital artwork into a tangible embroidered piece. By following the step-by-step guide outlined above, you can ensure that your designs are ready for stitching, with the right stitch types, colors, and settings for optimal results. With practice and attention to detail, you can create beautiful embroidered designs from any image, whether for personal projects or commercial use.
FAQS About Converting an Image into an Embroidery Design
Q1: Can I convert any image into an embroidery design?
A1: Not all images are suitable for embroidery. Simple, high-contrast images with clear lines and minimal detail work best. Complex photos or images with intricate shading may not translate well into embroidery designs.
Q2: Do I need special software to convert images into embroidery designs?
A2: Yes, you need embroidery digitizing software to convert an image into an embroidery design. This software helps you trace the image, adjust stitch settings, and assign thread colors.
Q3: How long does it take to convert an image into an embroidery design?
A3: The time it takes to convert an image into an embroidery design depends on the complexity of the image. Simple designs may take just a few minutes, while intricate designs could take longer to digitize and perfect.
Q4: Can I use a photograph for embroidery?
A4: While photographs can be converted into embroidery designs, it is often better to simplify the image before digitizing. Photographs with complex shading and fine details may not reproduce well in embroidery.
Q5: What is the best file format for embroidery?
A5: Common embroidery file formats include DST, PES, and EXP. These formats are widely accepted by embroidery machines and allow for smooth machine operation.


Leave a Reply